How to Make Instagram Highlight Icons
In this step-by-step tutorial, you will learn how to create a set of Instagram story highlight icons in a cute, trendy marble watercolor style.
Also, you will learn a bit of theory and draw icons on your own! You can use this lesson as a template to make your own cool Instagram highlight icons and make your account look stylish and fabulous.
Also, you can simply download ready-to-use Instagram highlight icons from Envato Elements. Here are some examples:
Instagram Marble Highlight Covers
Instagram Story Highlights Covers With Texture
Instagram Highlight Covers in Pink Gold
Elegant Instagram Highlight Covers
And you can also find a much wider range of social media icons to meet every need:
Social Media
54 Best Social Media Icon Sets for Web, Apps, and More
Melody Nieves
What You Will Need
If you want to go the easy way, you can simply download the assets:
Watercolor background
Travel icons set
You also need Adobe Photoshop and Adobe Illustrator (you can download a trial from the Adobe website.)
To make your own unique covers, you'll need:
access to Adobe Photoshop and Adobe Illustrator (if you don't have the software, you can download a trial from the Adobe website)
watercolor paints, brush, and watercolor paper
photo camera or scanner (a smartphone's camera is good)
Download the programs, prepare your paints, and we can start!
Download the programs, prepare your paints, and we can start!
But first, some theory.
But first, some theory.
1. About Instagram Story Highlight Icons
1.
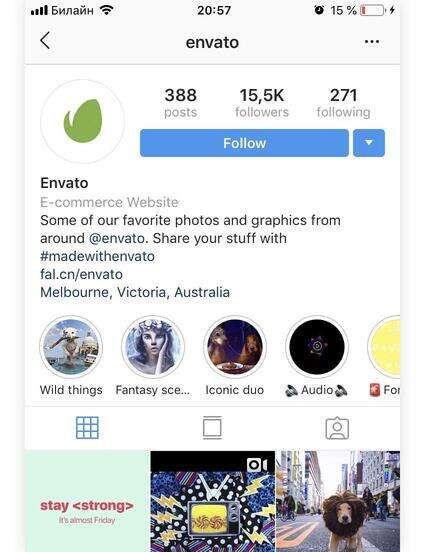
Instagram Stories Highlights are selected and saved stories from your profile, which are fixed under the account information and are available for users to view at any time, even after 24 hours. They are located below your account information (for example, look at Envato's account).
It is a cool possibility to share important information with your followers and new visitors and to save the best stories from your blog. Stories Highlights are located at the top of your profile and harder to miss.
Also, you can add your own covers for Instagram Highlights. Covers are a great way to add more identity to your profile and make it more cohesive. Now, you can make a really stylish blog with a unique design.
There are a lot of styles and variants of Instagram Highlight covers. Today, we will learn how to make one of the most trendy and flexible variants, which you can apply to many themes by simply changing the icons.
A hand-drawn watercolor background with a marble effect—what could be cooler? It's a universal way to add a light and crafty look to your profile and make it more elegant at the same time. Today we will create a travel-themed set as one of the most popular Instagram trends.
Let's start!
2. How to Make a Watercolor Marble Background
2.
Step 1
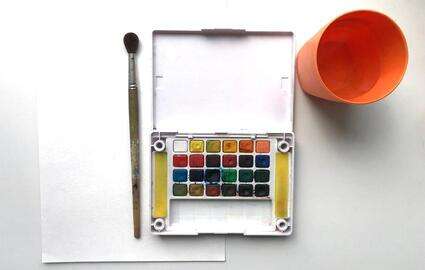
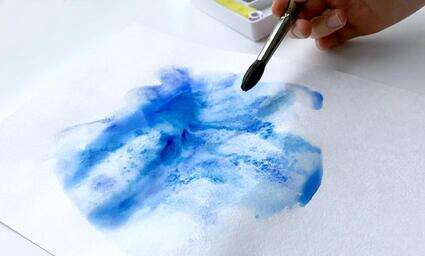
It is really easy and fast to create your own watercolor texture. You need colors, a brush (medium or big size), and paper. Don't use regular office paper—it's better to use special paper designed for watercolors. This paper is denser and does not deform when painting.
I want to make a blue background for my Instagram Stories Highlight covers, so I will use blue and turquoise colors.
Step 2
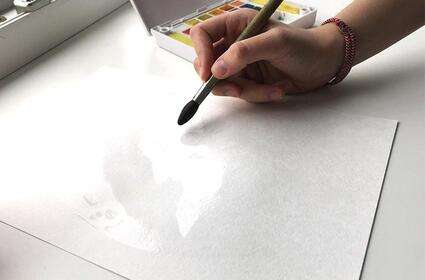
Add water on your paper. You should get a small puddle on the paper, so we need a good, thick watercolor paper.
Step 3
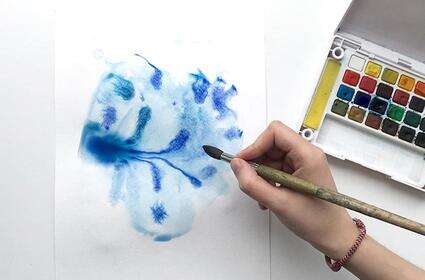
Randomly add some colors to your water spot.
Step 4
Drip water on the areas with paint and move the paper to paint beautifully blurred patterns on the sheet. I've added some regular kitchen salt to add a more interesting texture. Leave it to dry.
Step 5
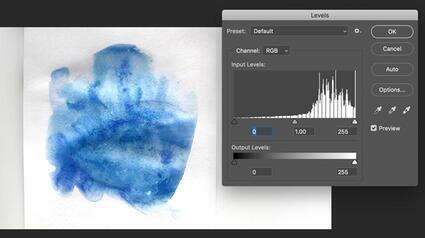
Our watercolor marble texture is ready. Make a good photo or a scan and send it to your computer (by Bluetooth, AirDrop, sent via email, USB, etc.).
Open it in Adobe Photoshop. Use Levels (Command-L) and move the white and black slider a bit to add brightness and contrast. Also, you can use the Hue/Saturation panel (Command-U) and move the Saturation slider a bit to make your texture more colorful.
The texture is ready! Congratulations!
3. How to Make Instagram Highlight Icons
3.
We will make a small, travel-themed icon set. It is optional—you can make icons on another theme. To make it readable even at a small size as a Highlight cover, don't add tiny details and thin lines.
Step 1
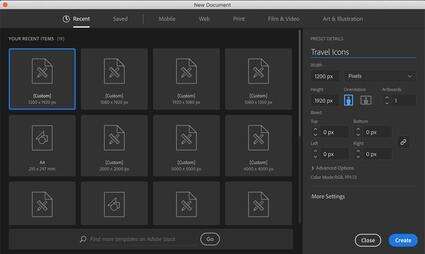
First of all, we need to prepare our workflow.
Create a New Document (Command-N, or File > New) in Adobe Illustrator and set the size. We will make the final cover design in Adobe Photoshop, so the current size is not very important, but I advise you not to use a size that's too big or small. I used 1200px x 1920px.
Step 2
We will start with the plane icon.
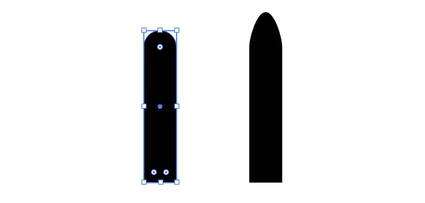
With the Rectangle Tool (M), draw a vertical black rectangle. Choose the Direct Selection Tool (A), click on the rectangle, and with the Shift key pressed, select the two white circles in the upper corners and move the cursor to the side, keeping the mouse button pressed. You'll get rounded corners.
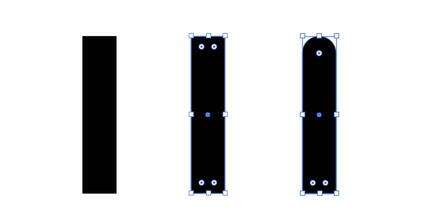
With the same Direct Selection Tool (A), select the top points (holding Shift) and move them up by pressing the Up Arrow on the keyboard. Now we have the plane's base.
Step 3
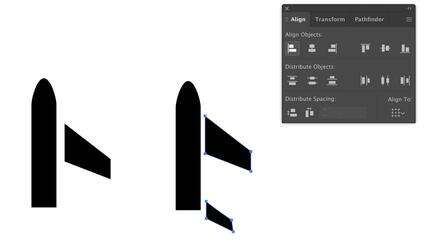
Select the Pen Tool (P) and draw the wing shape. Next, draw the shape of half of the tail. Horizontally align them (Window > Align) left.
Step 4
Add a small rectangle shape (R) to the wing. Move the bottom left point up with the Direct Selection Tool (A). Select the small rectangle and the main wing shape (Selection Tool, V) and group them (Command-G).

Step 5
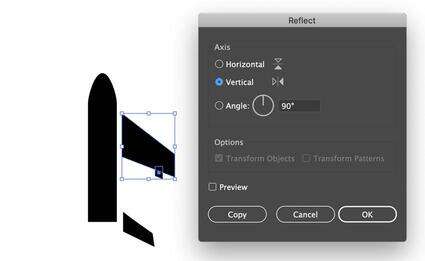
Select the wing and make a copy (Command-C) and paste in front (Command-F). Right-click on the top wing and select Transform > Reflect. Choose Vertical axis and click OK.
Step 6
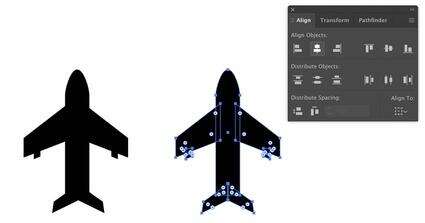
Move the top wing to the left. Repeat the action with the tail. Group the wings and tails separately. Select the three objects (wings, tails, and the main body shape) and align them to center.
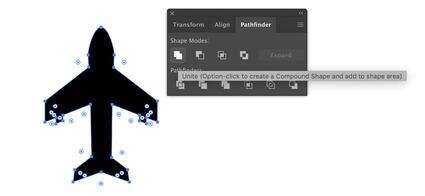
Step 7
Our plane is almost done! Move the bottom points of the main shape a bit (with the Direct Selection Tool, A) and Unite (Window > Pathfinder > Unite). Move the points a bit if you want, and we are done!
Step 8
It's time for the next icon: a camera.
Draw a rectangle (M) and round its corner. Simply click on the shape with the Direct Selection Tool (A) and move the cursor to the side, keeping the mouse button pressed.

Step 9
Add two smaller rectangles. Round their corners too. To make your workflow more comfortable, use Redo (Command-Z), Zoom-in (Command- +), and Zoom-out (Command- -).

Step 10
With the Ellipse Tool (L), draw a circle on the camera. Set the white color (Window > Color).

Step 11
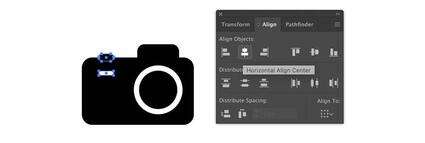
Copy (Command-C) and paste in front (Command-F) your white circle, change the color to black, use the Selection Tool (V), hold Shift, and make it a bit smaller. Select both your circles and the top rectangle and align them to the center (Window > Align).

Step 12
Draw a small rectangle and color it white. Align it with the small black one on the top.
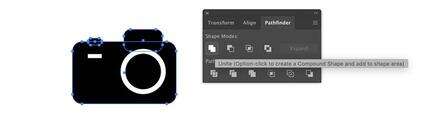
Step 13
Select all three black rectangles and Unite them (Window > Pathfinder > Unite).
Step 14
Now, select all the camera's shapes and Divide them. Delete (Backspace) all the white shapes. The camera icon is done!

Step 15
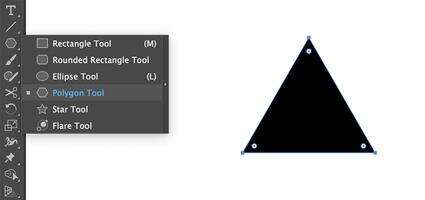
The last icon for our travel Highlights covers is the cocktail drink. You can add food and drink related stories under this cover.
First of all, let's make the main glass shape. Use the Polygon Tool (click on the rectangle icon on the left tool panel and select the Polygon from the list). While drawing the shape, press the Down Arrow on the keyboard to set the number of angles. Now we have a triangle.
Step 16
With the Selection Tool (V), make it wider. Draw two rectangles (M) and put it under the triangle. Reduce the bottom one and round its corners (Direct Selection Tool, A). Select all shapes and align them (Window > Align).

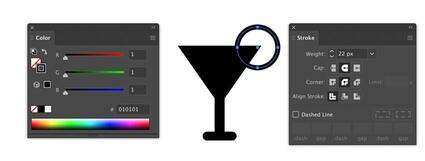
Step 17
Select the Ellipse Tool (L), set the stroke color (Window > Color) to black, and the fill is none. Open the Stroke panel (Window > Stroke), set Round Cap, and make the Stroke Weight much wider (I used 22 px).
Step 18
Using the Scissors Tool (C), cut your circle close to the glass shape. Delete this new path.

Step 19
With the Pen Tool (P), draw the cocktail straw. Select all the elements and go Object > Path > Outline Stroke. Select all the elements again and Unite them (Window > Pathfinder > Unite).
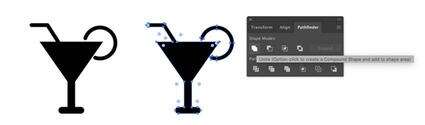
The drink icon is ready! Now we can finally make our Instagram Stories Covers!
4. How to Make an Instagram Highlight Cover
4.
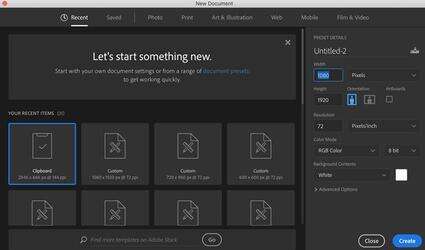
Step 1
Make a New Document (Command-N or File > New) in Adobe Photoshop. Set 1080 px Width and 1920 px Height. The resolution is 72 Pixels/Inch. It is a standard Instagram Stories dimension. The Instagram Story Highlight cover is the same as a regular Story size.
Step 2
Place your watercolor texture in your file (File > Place Embedded).
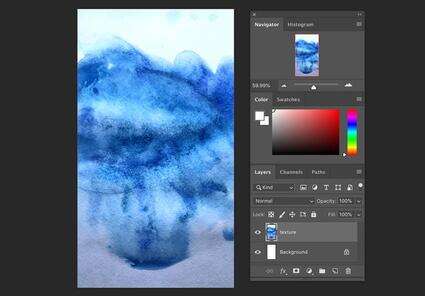
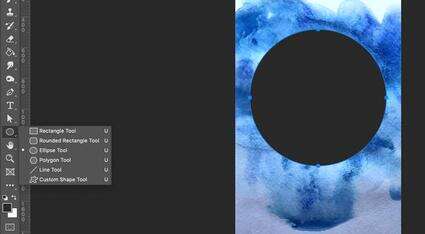
Select the Ellipse Tool (U) from the side tool panel. Draw a circle in the middle of the picture. Hold Shift while drawing to make a perfect circle.
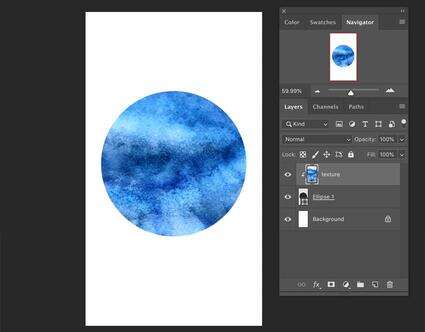
Step 3
Move the circle layer under the texture layer. Hold Alt and click between these layers. Now you have a clip layer.
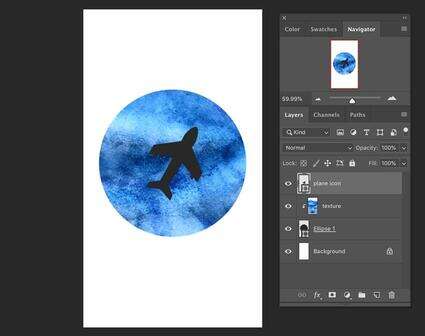
Step 4
Go to your Adobe Illustrator file and select the plane icon. Copy (Command-C) and paste (Command-V) it to your Photoshop file. Select Paste as Shape Layer. Move, scale, and rotate it using the Transform Tool (Command-T).
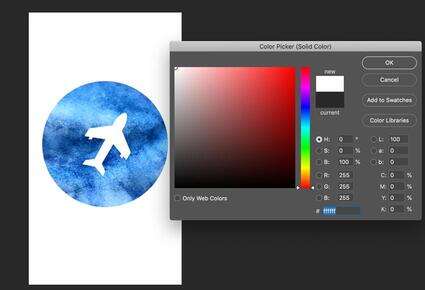
Step 5
Double-click the icon's layer and change its color to white.
Congratulations! Your cover is ready. Repeat the steps for other icons. You can experiment and do it without the circle or change the icon's size. Improvise!
Save (File > Save as) the cover as .jpeg and send it to your phone.
5. How to Set Your New Highlight Covers
5.
Step 1
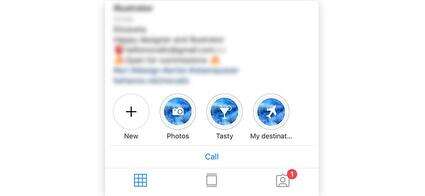
Go to your Instagram account and select the New circle (make new Stories Highlights) under your bio. Select some previously published stories to collect them as a set.
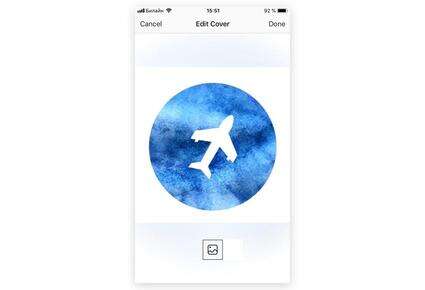
Next, click Edit Cover under the automatically suggested cover. Click the small photo icon and select our new watercolor picture.
Align it, and we are ready!
We Are Finished!
Congratulations! Your cool Instagram profile with designer covers is ready. Today we've learned how to make Instagram highlights icons. You can use this workflow as a base and create your own covers.
Thank you for creating and experimenting with me. Enjoy the process, and please share your result!
Check out some of our other awesome tutorials and articles about this type of design!
Instagram
How to Create an Instagram Story Cover: Photoshop in 60 Seconds
Melody Nieves
Instagram
How to Create an Instagram Story Template: Photoshop in 60 Seconds
Melody Nieves
Social Media
20+ Social Media Image Maker Templates for Instagram, Facebook + More
Nona Blackman